Control Which Document Types Can Be Used in Which Folder
Introduction
Goal
Control which document types can be used to create documents in which folders.
Reasons
- Help authors organize and structure their content by minizing the number of decisions they have to make.
- Simplify delivery tier implementation using wildcard sitemap items (e.g. /products/**.html matching all documents in the /products folder and its subfolders) by making sure all matched documents are of the same type.
Method
The list of document types that can be used within a folder is the result of a query. The default query returns all document types. By configuring a different query for a folder, the document types that can be used in that folder can be restricted.
The following two use cases are described:
- Using Document Types Included with Out-of-the-box Features
- Manual Configuration for Custom Document Types
Optionally the following can be (manually) configured in both use cases:
|
Before |
After |
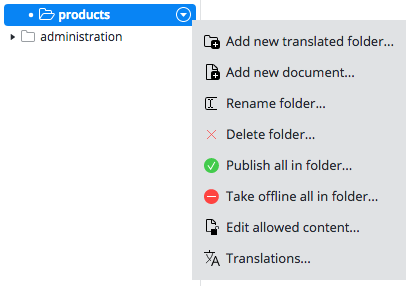 |
 |
 |
 |
Using Document Types Included with Out-of-the-Box Features
When using out-of-the-box features from the library (such as News or Events) typically any folder created by the feature is already configured to allow only the document type that is included in the feature.
Additional folders can be created and their restrictions configured through the CMS UI.
Example
This example assumes the "News" feature has been added to the project, and an additional folder "press releases" has been created which must be restricted to only allow "news" documents to be created inside it.
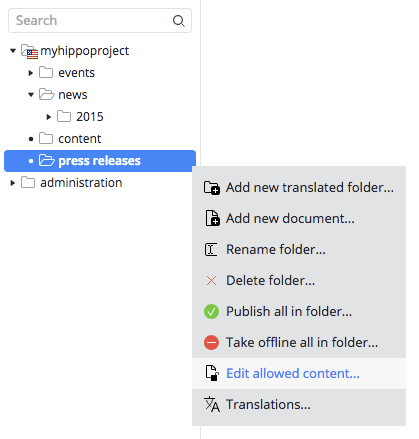
In the Content perspective, browse to the "press releases" folder and select "Edit allowed content..." from the popup menu:
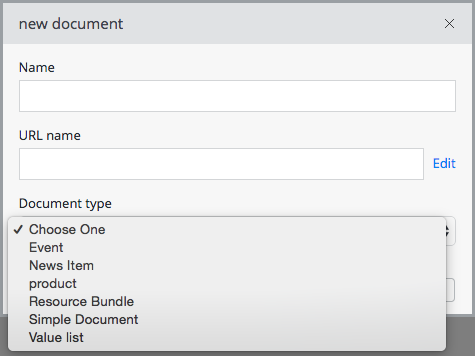
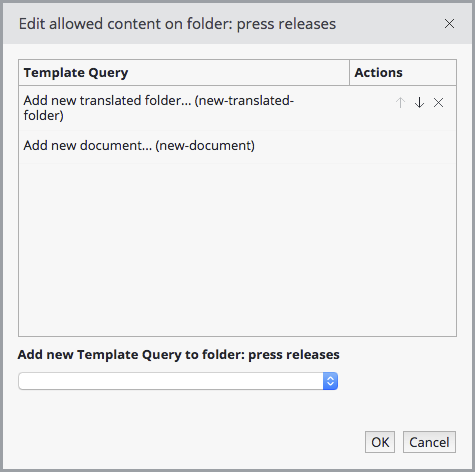
The "press releases" folder has the generic default queries configured ("Add new translated folder" and "Add new document").
Remove both queries by hovering the mouse cursor over the "Actions" column and clicking on the "X" icon.
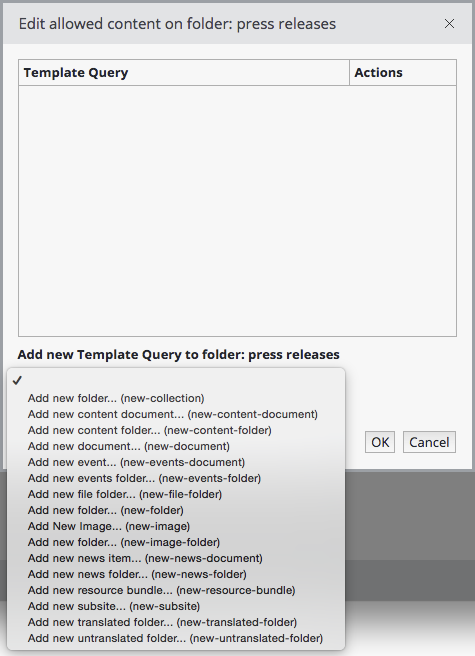
Select "Add new news folder" and "Add new news item" from the dropdown at the bottom of the dialog:
The "press releases" folder is now configured to only allow "news" document to be created, as well as "news folders" which applies the same restriction recursively to subfolders:
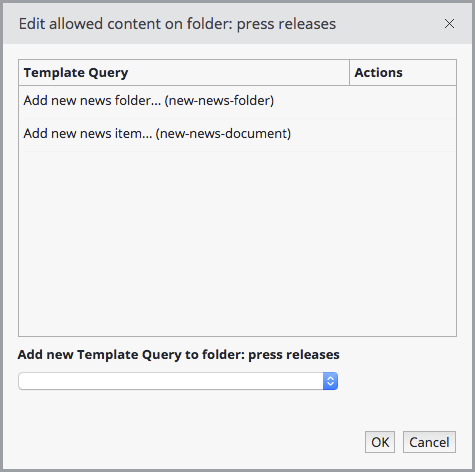
Click "OK" to apply the configuration changes.
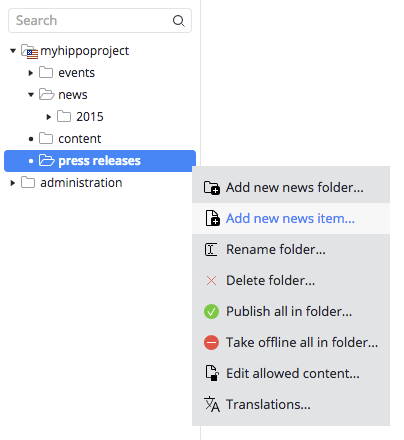
The context menu for the "press releases" folder now no longer contains the generic "Add..." options, but has "Add new news folder" and "Add new news item" instead:
Manual Configuration for Custom Document Types
If the project contains custom document types (i.e. not part of an out-of-the-box feature), corresponding template queries must be defined to be able to set up restrictions.
Since Bloomreach Experience Manager 12.3, you can use the Template Query Generator (part of the Essentials development tools) to generate template queries for your custom documents.
It's also possible to define custom template queries through manual configuration using the Console, as described in the example below.
Example
Goal: configure the folder /content/documents/myhippoproject/products to restrict new documents to the document type myhippoproject:product.
1. Configure a Query for the Product Document Type
-
In the console, copy the node
/hippo:configuration/hippo:queries/hippo:templates/new-document
to
/hippo:configuration/hippo:queries/hippo:templates/new-product
-
Limit the queried document types to myhippoproject:product:
/hippo:configuration/hippo:queries/hippo:templates/new-product:
  jcr:statement: //element(*,hipposysedit:namespacefolder)
                   /element(*,mix:referenceable)
                   /element(*,hipposysedit:templatetype)
                   /hipposysedit:prototypes
                   /element(hipposysedit:prototype,myhippoproject:product)
Note that only the last part of the JCR statement changes from hippo:document to myhippoproject:product.
-
Change the i18n label(s):
/hippo:configuration/hippo:translations/hippo:templates/en:
  new-product: new product
-
Save your changes.
2. Configure a Query for Sub Folders
The next step is the change the query to create sub folders in the products folder. These child folders should also limit the document types to myhippoproject:product.
-
Copy the node
/hippo:configuration/hippo:queries/hippo:templates/new-translated-folder
to
/hippo:configuration/hippo:queries/hippo:templates/new-product-folder
-
Change the JCR statement to create child folders:
/hippo:configuration/hippo:queries/hippo:templates/new-product-folder:
  jcr:statement: /jcr:root/hippo:configuration/hippo:queries/hippo:templates
                     /new-product-folder/hippostd:templates/node()
Notice the change of new-translated-folder to new-product-folder.
-
Change the available queries in a new product folder:
/hippo:configuration/hippo:queries/hippo:templates/new-product-folder/hippostd:templates/hippostd:folder:
  hippostd:foldertype: [new-product-folder, new-product]
Note that these values refer to the JCR node names of the queries we are creating in this example.
-
Change the i18n label(s):
/hippo:configuration/hippo:translations/hippo:templates/en:
  new-product-folder: new product folder
-
Save your changes.
3. Configure the Folder to use the Queries
- In the Content perspective select the folder myhippoproject > products.
- From its popup menu select "Edit allowed content". A dialog appears.
- Remove any options currently configured.
- From the dropdown add the options "Add new product folder... (new-product-folder)" and "Add new product... (new-product)".
- Click "OK" to apply the configuration changes.
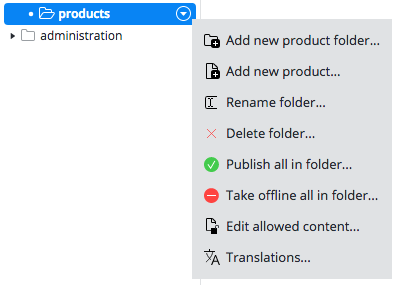
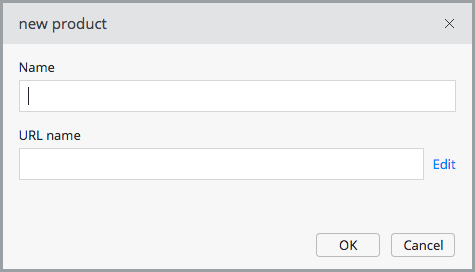
- The menu for the "products" folder now contains the "Add new product folder..." and "Add new product..." options.
Use a Custom Icon
By default, one of the following two icons is used for the "Add new..." menu items:
- a folder icon if the query names ends with "folder" (e.g. new-product-folder)
- a document icon otherwise.
Optionally a custom icon can be used for any "Add new ..." menu item by placing an SVG icon with a viewport of 16x16 pixels in the following directory in your project:
cms/src/main/resources/org/hippoecm/frontend/plugins/standardworkflow
The file name of the icon must match the menu item's query name, postfixed with -tiny.
For example a custom icon for the query new-product would be stored at
cms/src/main/resources/org/hippoecm/frontend/plugins/standardworkflow/new-product-tiny.svg
After rebuilding and restarting the application the menu item will show the custom icon.

