Configure Image Variants
Previous Step
Select Out-of-the-Box Features
With the out-of-the-box features added to your project you will now configure the different image sizes for the web site.
Configure Image Set
Point your browser to the Essentials setup application: http://localhost:8080/essentials/.
Select Tools from the menu, then Gallery manager. This will load the Gallery Manager which allows you to configure the different image sizes used in your site. Each image uploaded to the CMS will be stored as an image set containing all configured size variants.
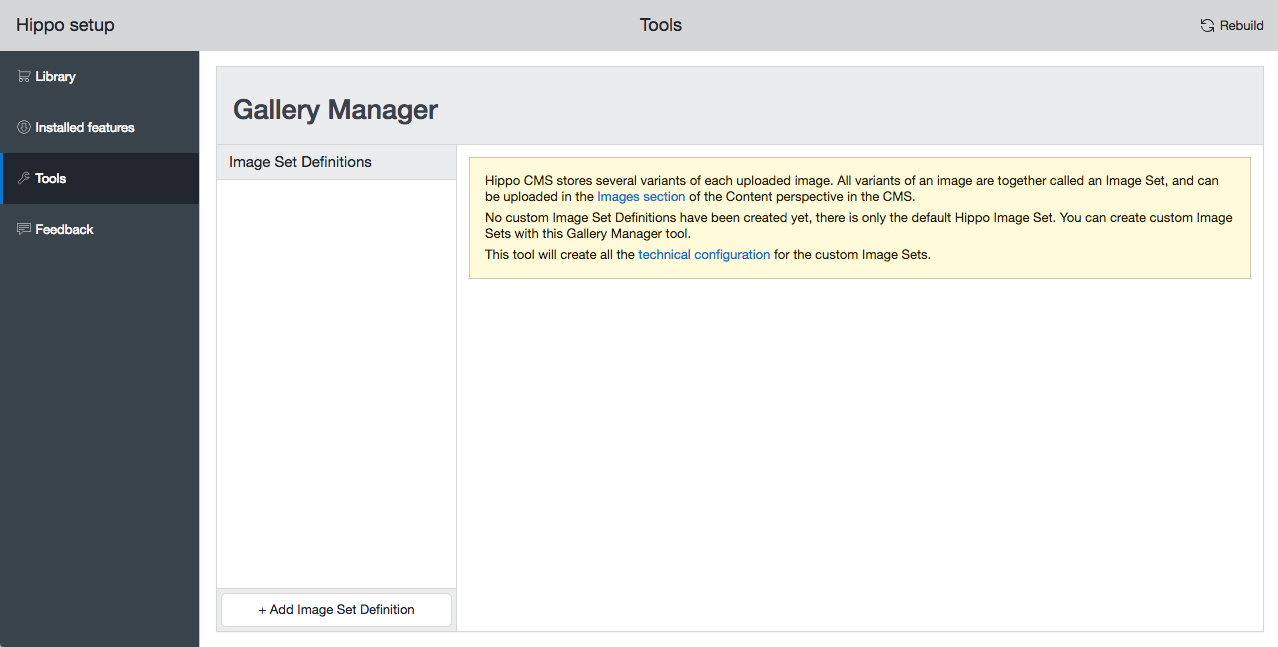
Since this is a new project you need to create an image set configuration for it first.
In the Gallery Manager, click the Add Image Set Definition button and enter 'imageset' as the name of the new Image Set Definition.
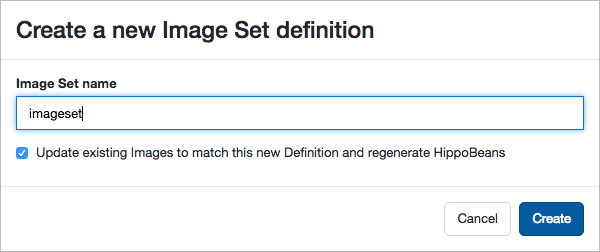
Make sure the option Update existing Images to match this new Definition and regenerate HippoBeans is checked, and click on the Create button.
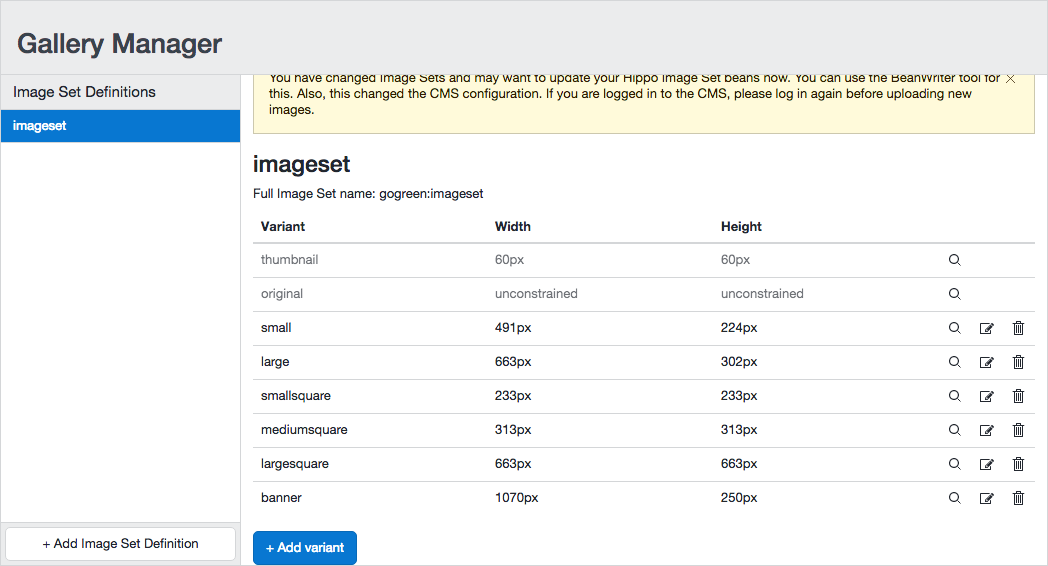
The custom Image Set Definition is created as a copy of Bloomreach Experience Manager's built-in Image Set Definition, including the two variants thumbnail and original. In the Gallery Manager, the new Image Set Definition gets selected automatically.
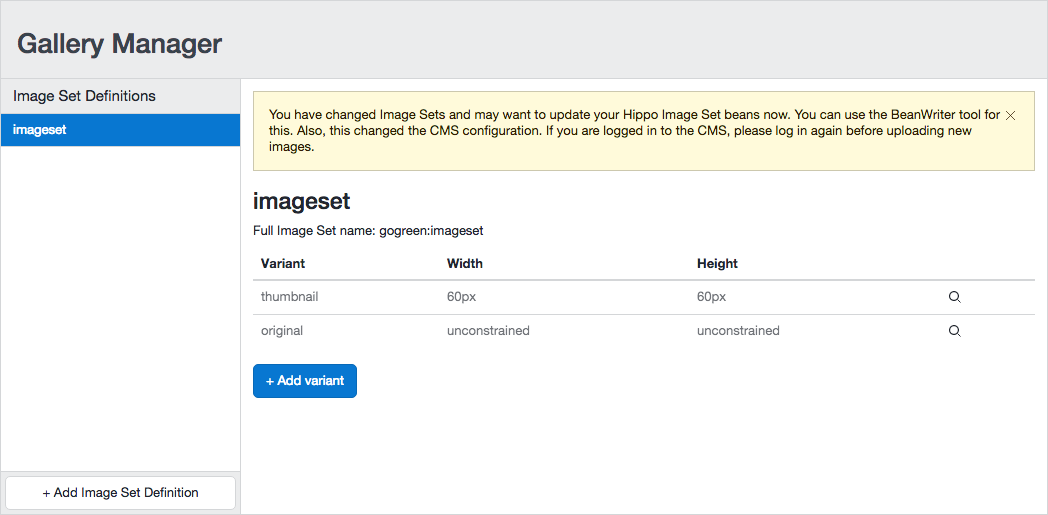
You can now add the image size variants used in the design:
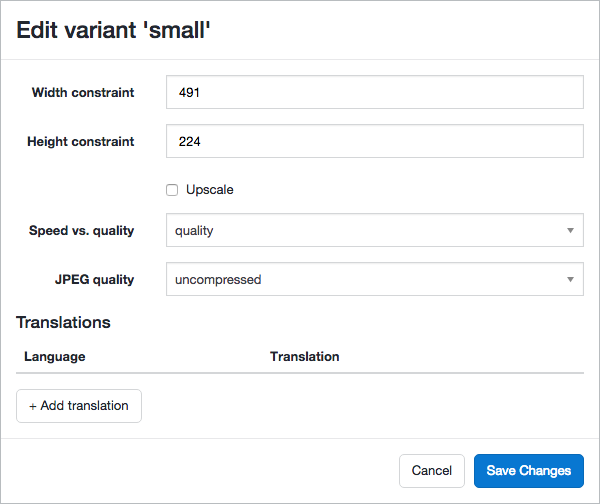
- small: 491 x 224 pixels
- large: 663 x 302 pixels
- smallsquare: 233 x 233 pixels
- mediumsquare: 313 x 313 pixels
- largesquare: 663 x 663 pixels
- banner: 1070 x 250 pixels
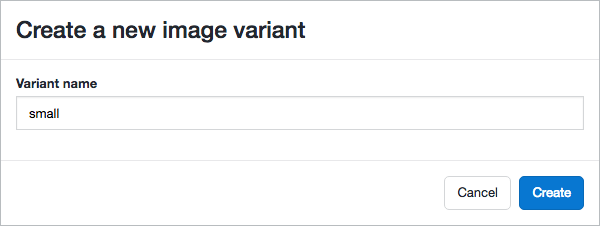
For each size variant, click the Add variant button, enter the name (use lower case), click Create, specify the width and height constraints and click Save Changes.
Your custom Image Set Definition now lists all custom size variants.
Recreate Content Beans
When adding or changing a size variant of your custom Image Set Definition, a message is displayed to notify you about the need to update the image set bean.

To update the image set bean, navigate to Tools and select Beanwriter. Here, you can recreate the Java classes that encapsulate the content items in the repository (including image sets) so the delivery tier can access them as Java beans.
Under Use the following image set for new methods of image return type select Imageset.
Make sure the checkbox Update existing methods with selected image set, too is checked. This is to ensure that the out-of-the-box features will be updated to use the newly configured image set.
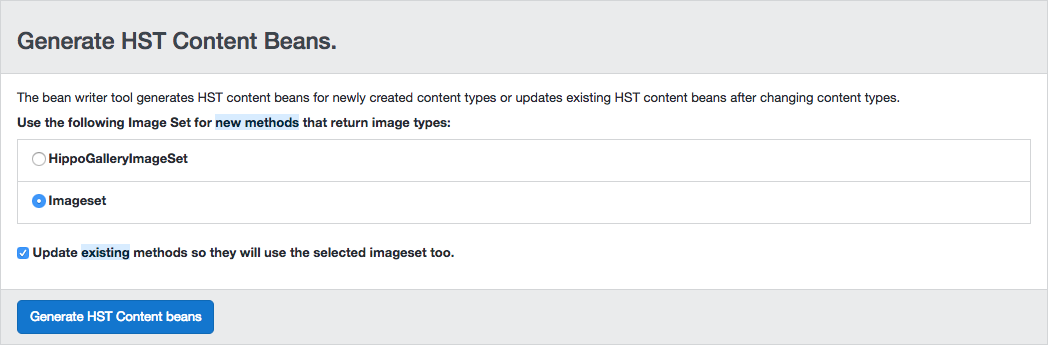
Click on the button Generate HST Content Beans to recreate the content bean Java classes. Some messages will be displayed including one telling you that a bean 'Imageset' was created.

Stop, rebuild and restart the application.
Point your browser to the Bloomreach Experience Manager UI: http://localhost:8080/cms/. Log in with username 'admin' and password 'admin'.
Click on To the content on the dashboard, select Images from the dropdown, and browse to an image. You will see the image in all different sizes you configured. Note that depending on the aspect ratio of an image, the actual dimensions of its variants might differ from the configured dimensions.
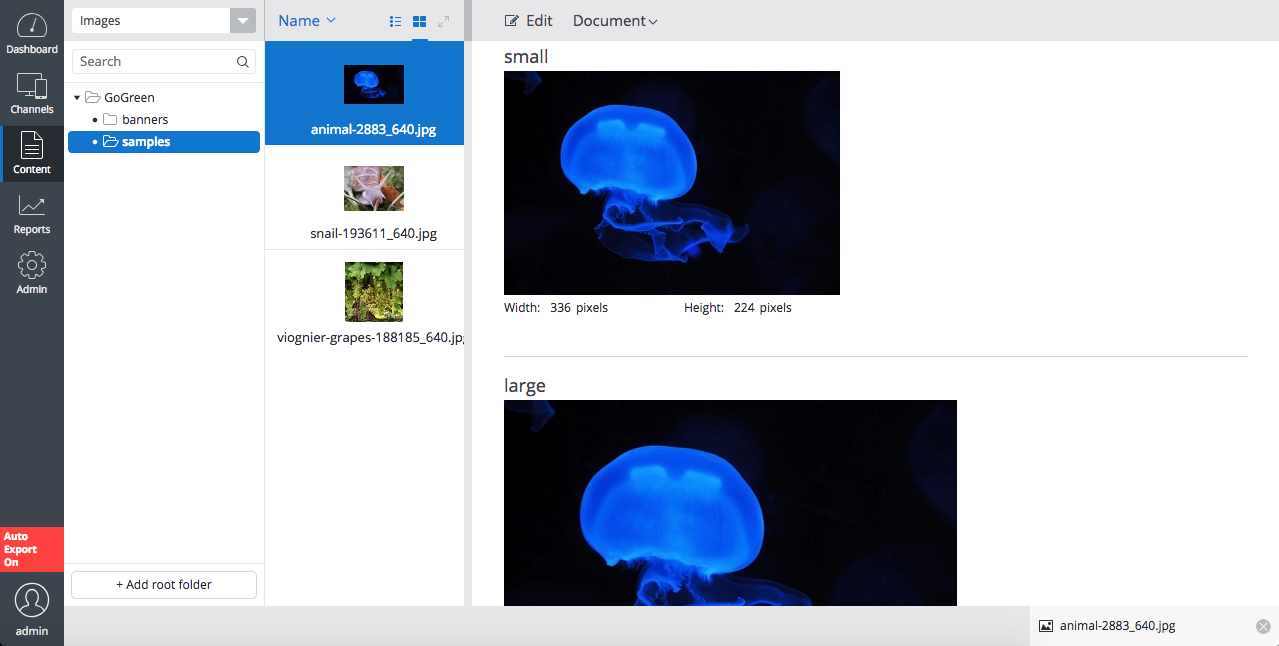
Also, note that you can edit image sets, and replace any variant by cropping the original or uploading an alternative image.