Switch Template Support
Introduction
Goal
Configure multiple variants of a Freemarker template, which can be selected in a component's configuration in the Channel Manager.
Background
With switch template support you can switch (in production) between multiple Freemarker templates for component items in container components configurable via the Channel Editor . Switch template works seamlessly with the Bloomreach Experience Manager modules Relevance and Experiments, where the latter is specifically interesting to find out whether the new template results in higher conversion. Switch template support requires you are using Freemarker templates as web files.
Use Switch Templates
Assume you have the following Freemarker templates stored as web files:
/repository-data:
  /webfiles:
    /src:
      /main:
        /resources:
          /site:
            /ftl:
              /base:
                /main:
                  /list.ftl:
              /layout:
                /webpage.ftl:
And you have a catalog component item that has webfile:/ftl/base/main/list.ftl or you have an existing container item configured in a container that has webfile:/ftl/base/main/list.ftl, and you need in the Channel Editor to be able to
- switch to a different view (renderer), or
- configure a different view depending on the visitor profile (Relevance) or
- try a different view to experiment conversions (Experiments).
then you can achieve this using the switch template feature.
Template Variants
To have multiple variants of a template like list.ftl available in the Channel Editor, you only need to create next to list.ftl a sibling folder called list and in the folder store the available variants. For example:
/repository-data:
  /webfiles:
    /src:
      /main:
        /resources:
          /site:
            /ftl:
              /base:
                /main:
                  /list:
                    /list-title.ftl:
                    /list-title-date.ftl:
                    /list-title-date-image.ftl:
                  /list.ftl:
              /layout:
                 /webpage.ftl:
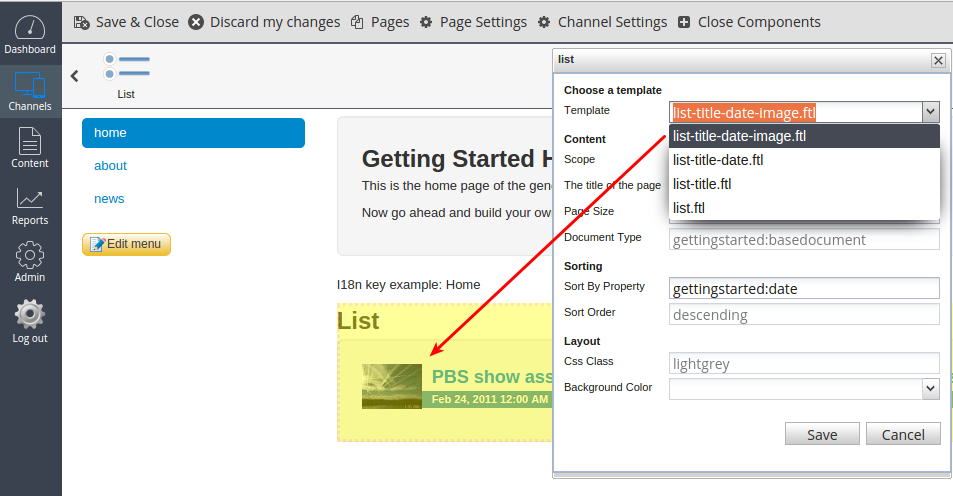
With the above web files setup, every container item component that uses webfile:/ftl/base/main/list.ftl will get in its properties window in the Channel Editor a drop down to switch to an alternative template.

Labels for Template Variant Names
As can be seen in the picture above, the drop down contains the files names of the freemarker templates
- list-title-date-image.ftl
- list-title-date.ftl
- list-title.ftl
- list.ftl
Achieving a label per Freemarker template works just like Backing a ResourceBundle with Properties Files and can be done by adding a resource bundle that is the name of the folder ( list in this example) plus .properties, i.e. list.properties in this example:
/repository-data:
  /webfiles:
    /src:
      /main:
        /resources:
          /site:
            /ftl:
              /base:
                /main:
                  /list:
                    /list-title.ftl:
                    /list-title-date.ftl:
                    /list-title-date-image.ftl:
                  /list.ftl:
                  /list.properties:
              /layout:
                 /webpage.ftl:
list.properties contains as keys the names of each of the freemarker template file and as value the display name you want to have for the template in the drop down, for example:
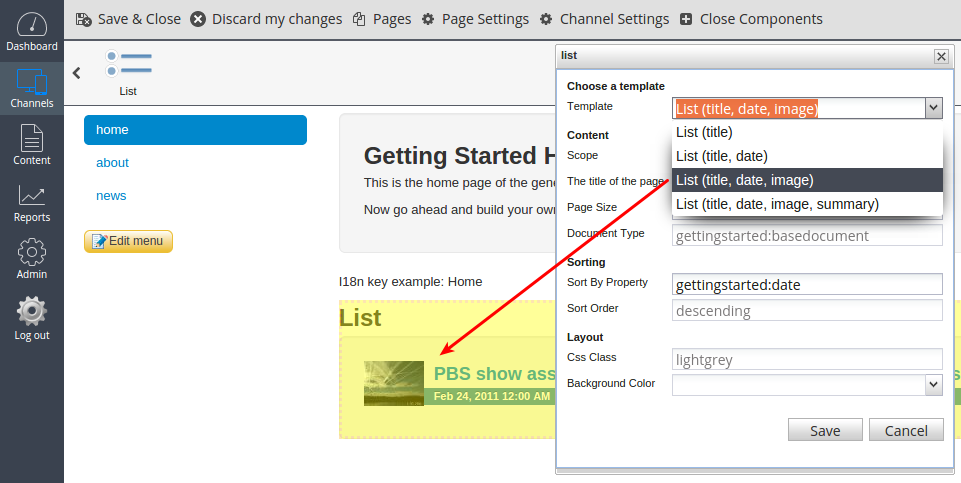
list.ftl = List (title, date, image, summary)
list-title.ftl = List (title)
list-title-date.ftl = List (title, date)
list-title-date-image.ftl = List (title, date, image)
Adding this results in a drop down with labels:

Localized Labels for Template Variant Names
To achieve localized labels for the template variants, for example for locale fr_FR you can add as a sibbling to list.properties also the file list_fr.properties or list_fr_FR.properties containing the localized labels in French/France.

