Add Workflow Process Management to a Project
Introduction
Goal
Add the Workflow Process Management feature to a BloomReach Experience implementation project.
Background
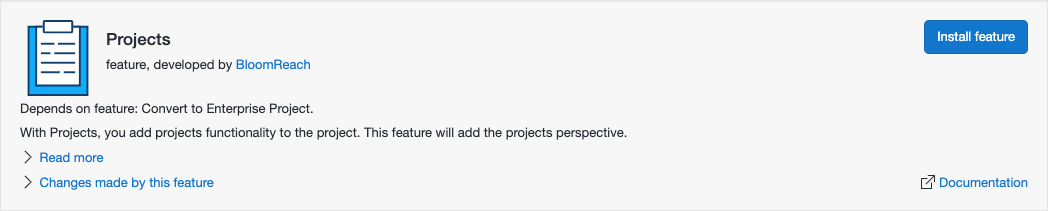
Workflow Process Management is an optional BloomReach Experience feature. This page explains how to add Workflow Process Management to an implementation project and configure its data stores in a local Cargo-based development environment. After the steps explained below, the CMS application will contain an additional perspective called 'Projects'.
Installation through Essentials
The Projects feature can be installed into your project through Essentials. If you start developing a new project, ensure that you "Make use of Enterprise features", navigate to the Library tab in Essentials, locate the Projects feature and click Install feature. Essentials then applies the steps documented for manual installation below to your project. Rebuild and restart your project, and continue to create an admin user for your /bpm application as described at the bottom of this page.
Manual Installation Instructions
Start with a BloomReach Experience project created using the Maven archetype, as explained in Set Up a BloomReach Experience Project.
Add Maven Dependencies
Add the following Maven dependencies:
cms-dependencies/pom.xml:
    <dependency>
      <groupId>com.onehippo.cms7</groupId>
      <artifactId>hippo-addon-wpm-cms-dependencies</artifactId>
      <type>pom</type>
    </dependency>
site/components/pom.xml:
    <dependency>
      <groupId>com.onehippo.cms7</groupId>
      <artifactId>hippo-addon-wpm-site-dependencies</artifactId>
      <type>pom</type>
    </dependency>
Configure an H2 Database JNDI Data Source
In your local Cargo-based development environment, configure a JNDI data source to store project data in the embedded H2 SQL Database.
Add the following JNDI environment variable to conf/context.xml:
    <Resource
      name="jdbc/wpmDS" auth="Container" type="javax.sql.DataSource"
      maxTotal="100" maxIdle="10" initialSize="10" maxWaitMillis="10000"
      testWhileIdle="true" testOnBorrow="false" validationQuery="SELECT 1"
      timeBetweenEvictionRunsMillis="10000"
      minEvictableIdleTimeMillis="60000"
      username="sa" password=""
      driverClassName="org.h2.Driver"
      url="jdbc:h2:./wpm/wpm;AUTO_SERVER=TRUE"/>
Add the BPM Webapp
In your project's top-level pom.xml, add the following dependencies:
      <dependency>
        <groupId>com.onehippo.cms7</groupId>
        <artifactId>hippo-enterprise-services</artifactId>
        <scope>provided</scope>
      </dependency>
      <dependency>
        <groupId>com.onehippo.cms7</groupId>
        <artifactId>hippo-addon-wpm-camunda</artifactId>
        <scope>provided</scope>
        <type>war</type>
      </dependency>
Now, add the BPM webapp to your local Cargo-based development environment.
Still in your project's top-level pom.xml, locate the cargo.run profile.
Inside the <deployables> element, add the following deployable:
                <deployable>
                  <groupId>com.onehippo.cms7</groupId>
                  <artifactId>hippo-addon-wpm-camunda</artifactId>
                  <type>war</type>
                  <properties>
                    <context>/bpm</context>
                  </properties>
                </deployable>
Inside the <container> element, add the following dependency:
                <dependencies>
                  <dependency>
                    <groupId>com.onehippo.cms7</groupId>
                    <artifactId>hippo-enterprise-services</artifactId>
                    <classpath>shared</classpath>
                  </dependency>
                </dependencies>
Add Dependencies to the Distribution Profiles
In the file src/main/assembly/webapps-component.xml, add the following directly inside the <component> element:
  <dependencySets>
    <dependencySet>
      <outputDirectory>webapps</outputDirectory>
      <outputFileNameMapping>bpm.war</outputFileNameMapping>
      <includes>
        <include>com.onehippo.cms7:hippo-addon-wpm-camunda:war</include>
      </includes>
    </dependencySet>
  </dependencySets>
In the file src/main/assembly/shared-lib-component.xml, add the following directly inside the <includes> element:
<include>com.onehippo.cms7:hippo-enterprise-services</include>
Add Loggers to Log4j2 Configuration
Add the following loggers to conf/log4j2-dev.xml and conf/log4j2-dist.xml:
<Logger name="com.onehippo.cms7.hst.configuration.branch" level="warn"/>
<Logger name="com.onehippo.cms7.services.wpm.project" level="warn"/>
Rebuild and Restart
Stop the application (if it was running), and rebuild and (re)start it as explained in the Getting Started Trail.
Verify that the CMS application now has a Projects perspective.
Create Admin User for BPM
Point your browser to http://localhost:8080/bpm/.
Create an administrative user for the BPM webapp using the form on this page.
Roles and Permissions
Log in to the CMS as admin and add all users that should be able to create, update, and delete projects to the group "webmaster".