Deploy the Project in the Blue Environment
In this step, you will use Mission Control to upload your distribution file, create the blue environment, and deploy the distribution in it.
Upload the Distribution
Log into Mission Control.
Browse to the Distributions tab on the Files screen.
Upload the distribution file you created in the previous step with 1.0.0 version number.
Create the Blue Environment
In Mission Control browse to the environments overview.
Click on the red + icon in the bottom right corner to create a new environment.
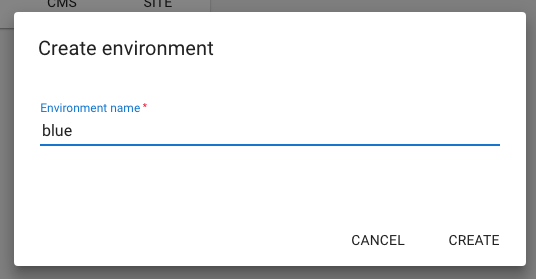
Enter the name "blue" and click on the Save button.

Deploy the Distribution in the Blue Environment
Select the blue environment and click on Deploy an Application. Select myproject-1.0.0-distribution.tar.gz and deploy it.

In the confirmation dialog click on Deploy.

The distribution will now be deployed, this can take a few minutes.
Configure the Application for the Blue Environment
The CMS and Site applications are now running, but because this is the first deployment in this environment some application configuration is required before they can be used.
First of all, you should change the default passwords for the default users.
On the Details tab of the blue environment, click on the CMS button. This will open the CMS application.
Log in as admin (using the default password).
Open the Admin perspective and click on Users. For all default users (admin, editor, author) change their passwords.

Before the website can be accessed, virtual hosts must be configured for this environment.
On the Details tab of the blue environment, click on the Console button. This will open the Console application is a new browser tab.
Log in as admin and browse to the node /hst:myproject/hst:hosts.
Add an hst:virtualhostgroup node called blue and create the following virtual host structure, replacing blue-mycloud.bloomreach.cloud with the domain name for the blue environment (shown in the URL bar of your browser):
/hst:myproject/hst:hosts:
  /dev-localhost:
    jcr:primaryType: hst:virtualhostgroup
  /blue:
    jcr:primaryType: hst:virtualhostgroup
    /cloud:
      jcr:primaryType: hst:virtualhost
      /bloomreach:
        jcr:primaryType: hst:virtualhost
        /blue-mycloud:
          jcr:primaryType: hst:virtualhost
          /hst:root:
            jcr:primaryType: hst:mount
            hst:mountpoint: /hst:myproject/hst:sites/myhippoproject
            hst:scheme: https
            hst:showport: false
            hst:showcontextpath: true
Browse to the node /hst:platform/hst:hosts.
Add an hst:virtualhostgroup node called blue and create the following virtual host structure, replacing blue-mycloud.bloomreach.cloud with the domain name for the blue environment:
/hst:platform/hst:hosts:
  /dev-localhost:
    jcr:primaryType: hst:virtualhostgroup
  /blue:
    jcr:primaryType: hst:virtualhostgroup
    /cloud:
      jcr:primaryType: hst:virtualhost
      hst:scheme: https
      hst:showcontextpath: true
      hst:showport: false
      /bloomreach:
        jcr:primaryType: hst:virtualhost
        /blue-mycloud:
          jcr:primaryType: hst:virtualhost
          /hst:root:
            jcr:primaryType: hst:mount
            hst:ismapped: false
            hst:namedpipeline: WebApplicationInvokingPipeline
Click on Write changes to the repository.
Verify the Release in the Blue Environment
Verify that the release is working correctly.
If everything works as expected, you can start routing production traffic to the blue environment.
Configure the Domain Name
Most likely you don't want your target audience to access your website on a URL like https://blue-mycloud.bloomreach.cloud. As an example, let's assume you registered the domain yourcompany.com and you want your website to be accessible at https://www.yourcompany.com.
Before you can use your domain name, the corresponding SSL certificate must be installed in your stack. Contact the Bloomreach Cloud support team to get this done.
Once the SSL certificate is installed, open Mission Control and browse to the Domains screen:
Click on the red + icon in the bottom right corner to add a new domain.
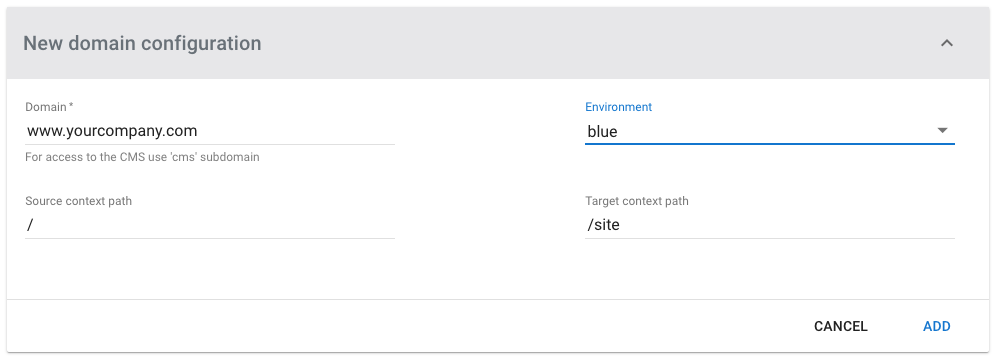
Enter www.yourcompany.com as domain, select the "blue" environment, and leave Source context path and Target context path at their default values.

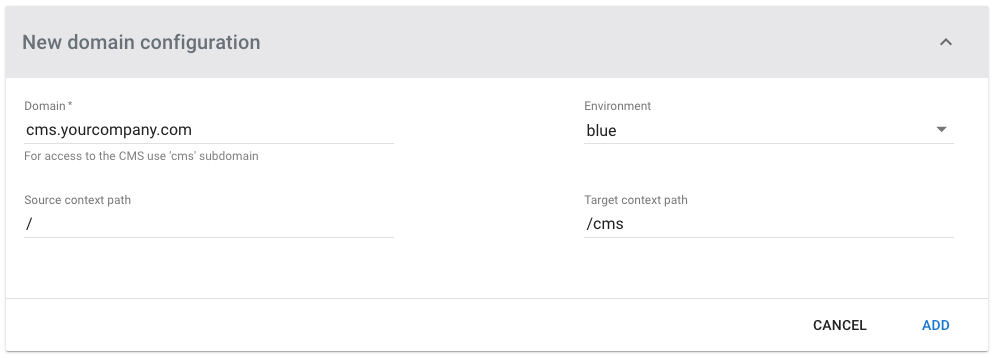
Do the same for cms.yourcompany.com. Set Target context path to "/cms". This will be the domain used to access the CMS application.

In the Console application, configure a virtual host for the domain:
/hst:myproject/hst:hosts:
  /dev-localhost:
    jcr:primaryType: hst:virtualhostgroup
  /blue:
    jcr:primaryType: hst:virtualhostgroup
  /yourcompany:
    jcr:primaryType: hst:virtualhostgroup
    /com:
      jcr:primaryType: hst:virtualhost
      /yourcompany:
        jcr:primaryType: hst:virtualhost
        /www:
          jcr:primaryType: hst:virtualhost
          /hst:root:
            jcr:primaryType: hst:mount
            hst:mountpoint: /hst:myproject/hst:sites/myproject
            hst:scheme: https
            hst:showport: false
            hst:showcontextpath: false
Click on Write changes to the repository.
Before you update the DNS records for www.yourcompany.com and cms.yourcompany.com, verify the routing by sending a request to your stack's API gateway (for example, api-mycloud.bloomreach.cloud) with the Host header set to the domain you are verifying. For example, using curl:
curl --verbose -H 'Host: www.yourcompany.com' https://api-mycloud.bloomreach.cloud
For the above example, the response should be the HTML for the website's homepage.
Once you have confirmed the routing is correct, change the DNS CNAME records for www.yourcompany.com and cms.yourcompany.com to point to the Bloomreach Cloud stack gateway.
Mark the Blue Environment as Production Environment
In Mission Control, at the top of the environments overview, you will see a message that there no production environment has been specified yet:

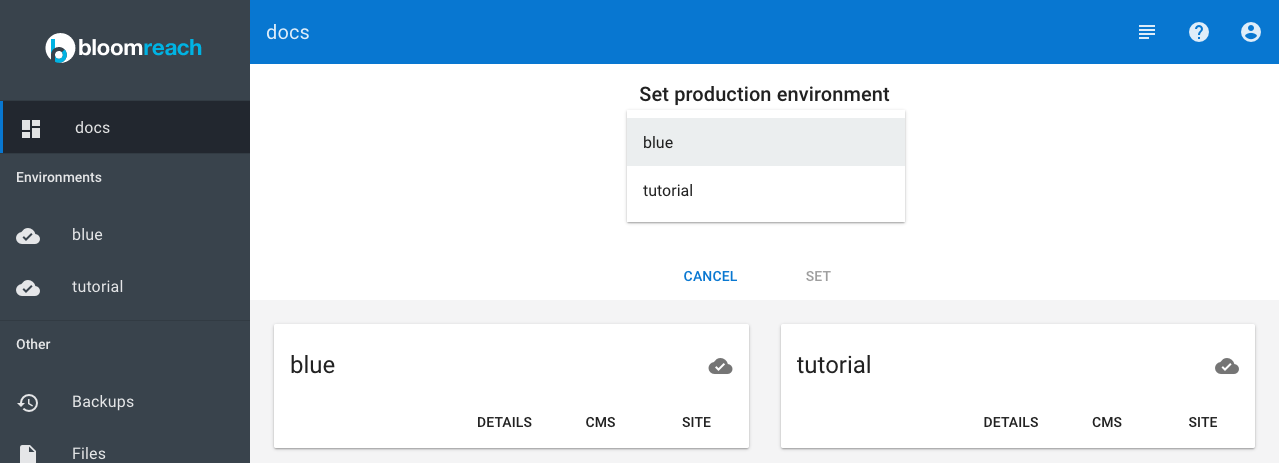
Click on Set Production Environment and select the blue environment:

Click on Set, and again in the confirmation dialog that pops up.
This marks the blue environment as production environment and ensures optimal performance and availability by allocating it more resources than non-production environments.


