Create a Document
In order to create a new document, navigate to the appropriate folder in the navigation area.
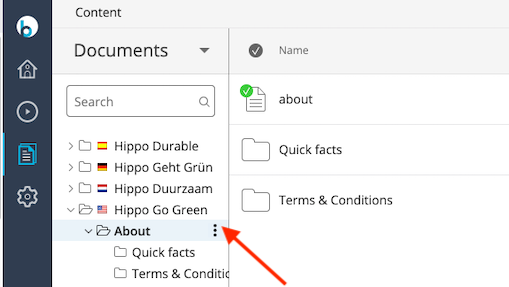
If you first need to create an appropriate folder (and sub-folder), hover over the appropriate parent folder, click on the down-arrow which appears to the right of the folder name:

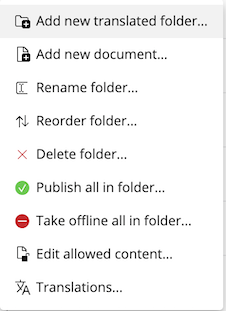
Select Add new translated folder... Enter the name of the to-be-created folder. If necessary, you can make the folder's name differ from the name that will be used in the URL. Then click OK.

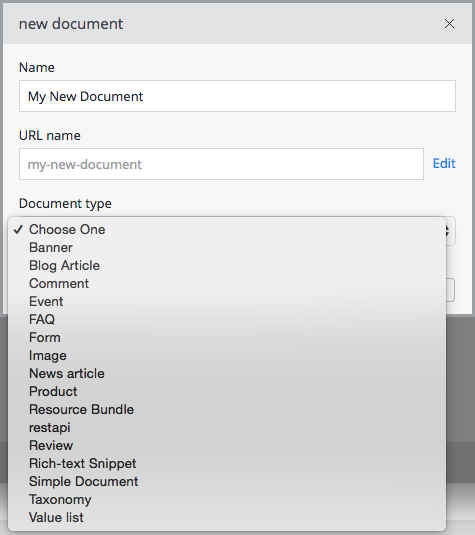
Now that an appropriate folder exists, hover over the folder, click on the down-arrow which appears to the right of the folder name, and select Add new document.... Select the appropriate document type and enter the name of the to-be-created document. If necessary, you can make the document's name differ from the name that will be used in the URL. Then click OK.

Depending on the selected document type, an empty template for the new document appears in the Document Viewer Area. The document is now in editing mode.
Fill in the fields and click on Done in the Document Viewer's menu bar. You'll notice that the document didn't actually close, but the Document Viewer changes to read-only viewing mode for this document. You can close the document by clicking on the close (x) button of the document's tab at the bottom navigation bar.

Rather than creating a document from an empty (or default) template, you can also copy an existing document. In order to do so, open the existing document in the Document Viewer and make sure you are not in editing mode (Done). Click on the Document button in the viewer's menu bar and select Copy... A dialogue box opens, which allows you to assign a new name to the copy and select an appropriate parent folder. Click OK to see the created copy in the Document Viewer.

