Create a Project
This page describes how to create a project to manage a group of related changes that require a workflow process before publication.
Open the Projects application.

Click on the + Project button in the top right of the screen.
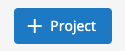
Enter a name and, optionally, a description for the new project. If you intend to run the project as a scheduled campaign, you may also enter start and end dates (they can also be changed or added later on).
Click Create. Three new tabs will appear alongside the Info & Schedule tab - Channels, Content, and Communication.
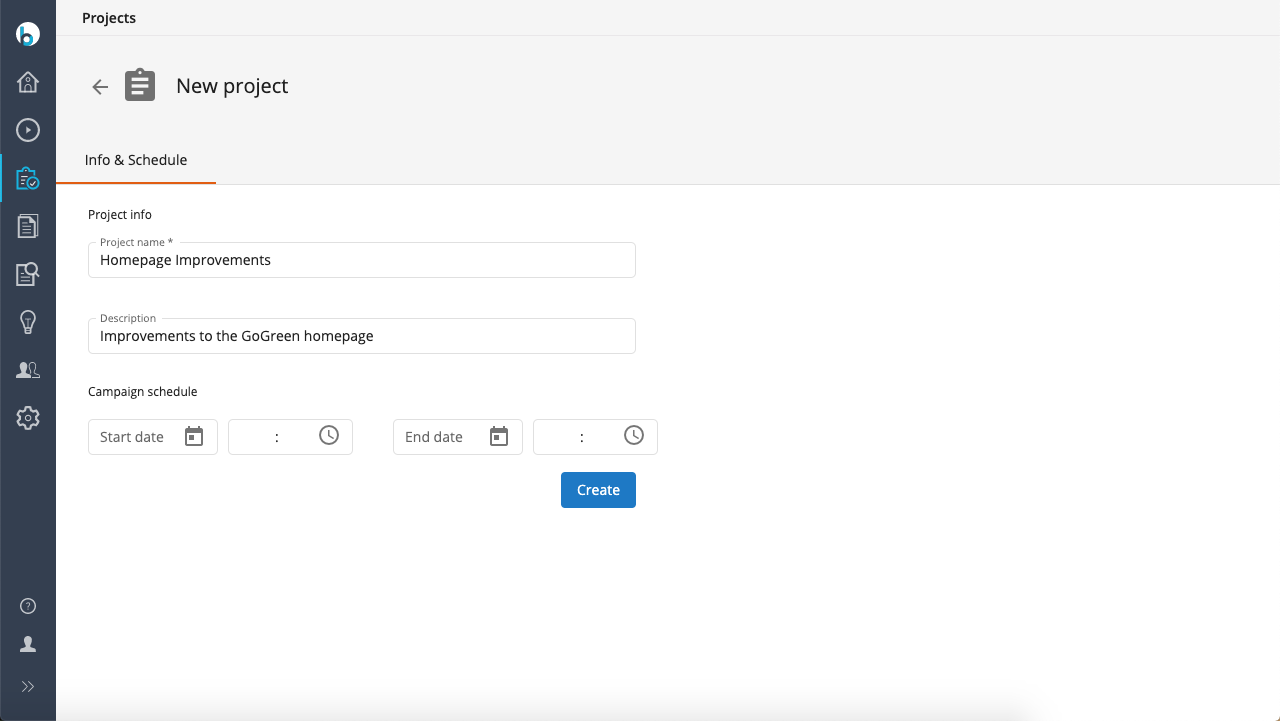
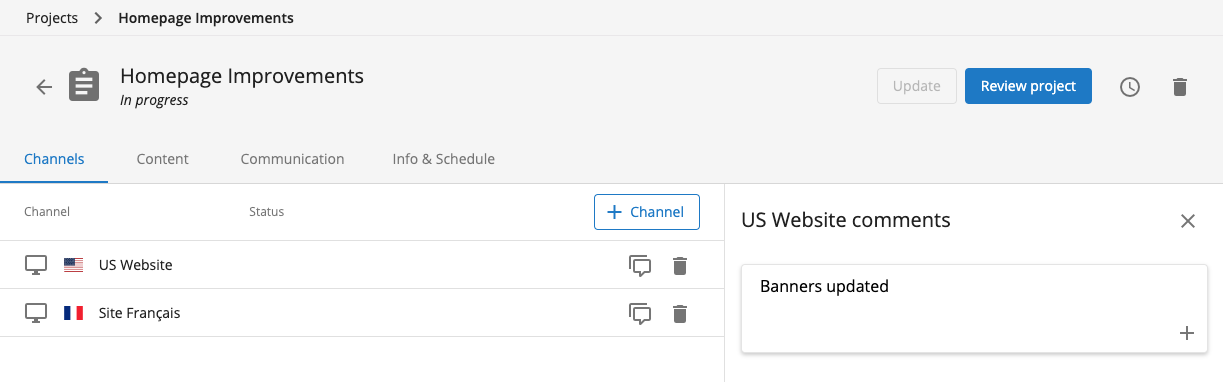
The Channels tab is automatically selected so that you can start making channel changes within the project. Start by clicking + Channel.
![]()
In the dialog that pops up, select one or more channels and click Add:
You are now ready to make changes to channels added to the project.
If you want to include content changes in a project, you need to add documents to the project, as a newly created project does not include any documents by default:
![]()
To add a document to a project, navigate to the Content application and to the document you want to add to the project. An additional menu option is available within the document view:

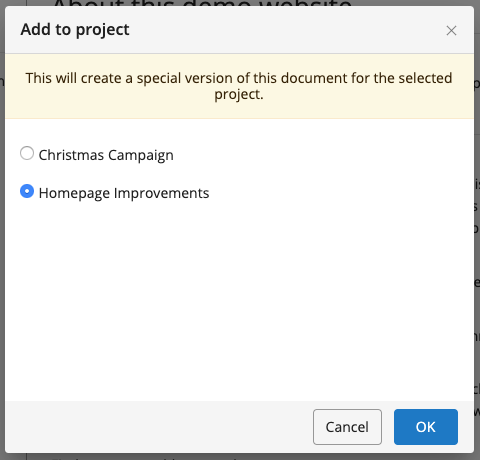
Clicking on Add to project will present a dialogue box where you can decide what project you would like to add the document to:
It is also possible to add a document to a project from within the Experience manager:
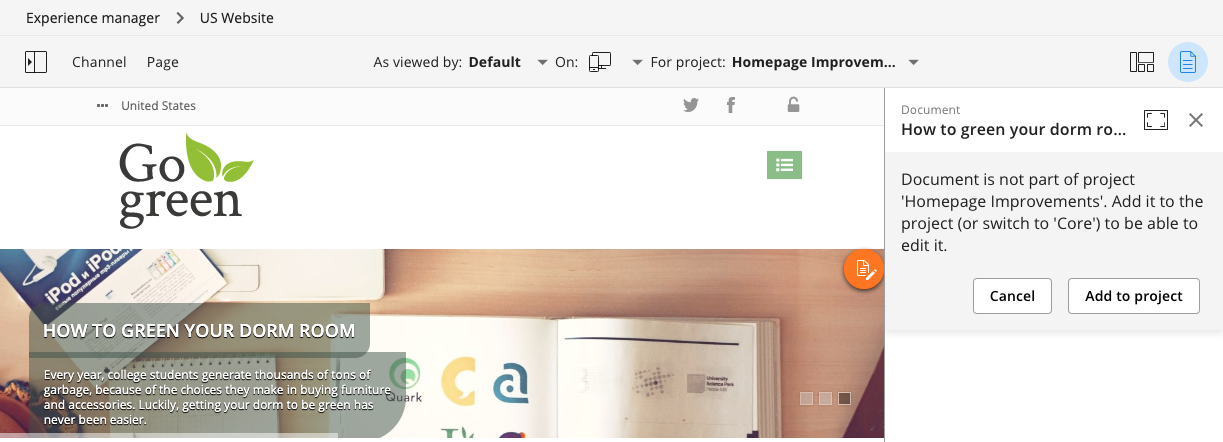
This option appears when you go to edit a document, in the context of a project, that is not currently part of the project.
If you add a document to a project it means you are ready to include content changes in the project.
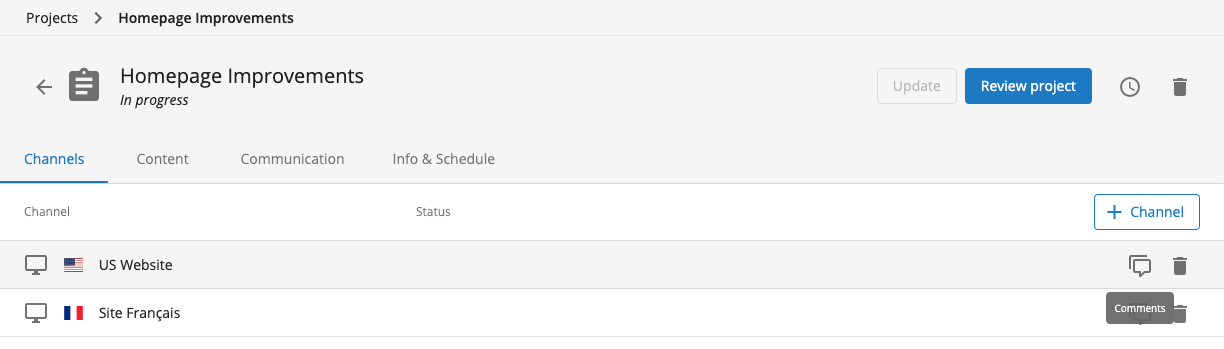
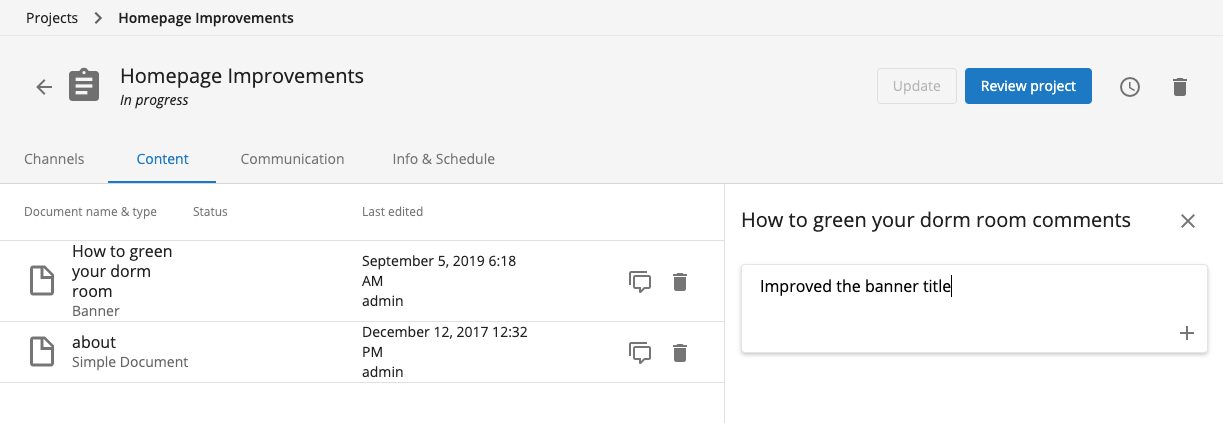
You can see the list of documents contained within a project by navigating to the Content tab within the relevant project:

It is possible at any time to remove a document from a project, or switch a document from one project to another. You can remove a document from a project from both the Content tab, within the Projects application, and from the document view in the Content application:
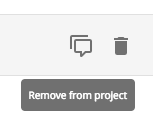
You can do this by clicking on the Remove from project menu item/icon.

Moving a document from one project to another is possible by clicking the Switch to project option in the document view from the Content application.
From the moment a project is created it is possible to add comments to it:
Comments can be added on all tabs. On the Info & Schedule tab, comments are not linked to a specific channel or document and are generic ‘project’ comments.

On the Channels tab the comments added are linked to specific channels; you can add a comment to a specific channel by clicking on the comment icon, entering a comment in the side panel and clicking +. The comments for that channel will then appear in a log below the Comment field. You can open and close this log as desired by clicking on the comment icon (to open it), and the X icon in the side panel (to close it).
The same functionality exists within the Content tab; comments can be added and viewed, and they are linked to a specific document:
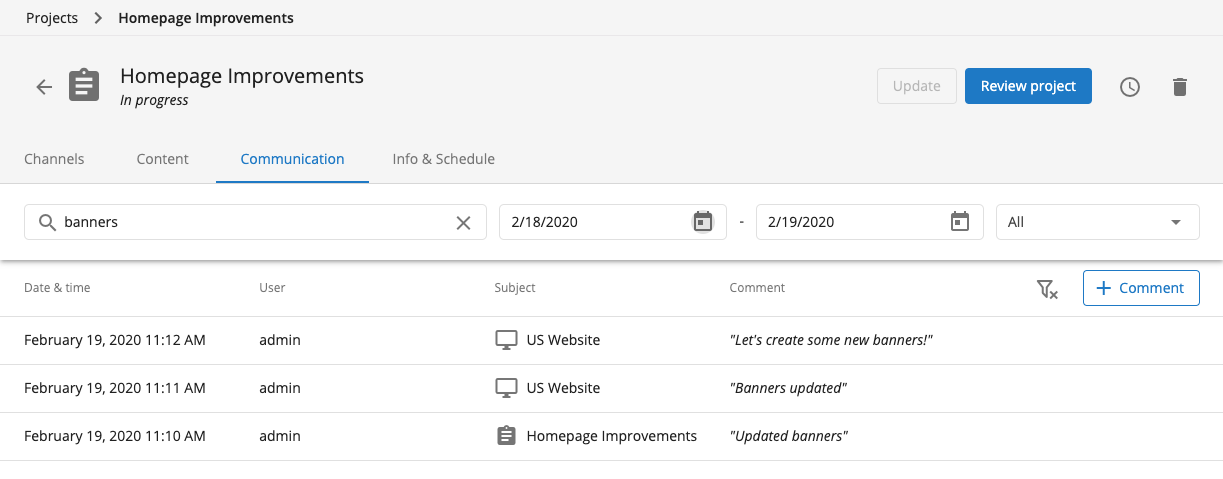
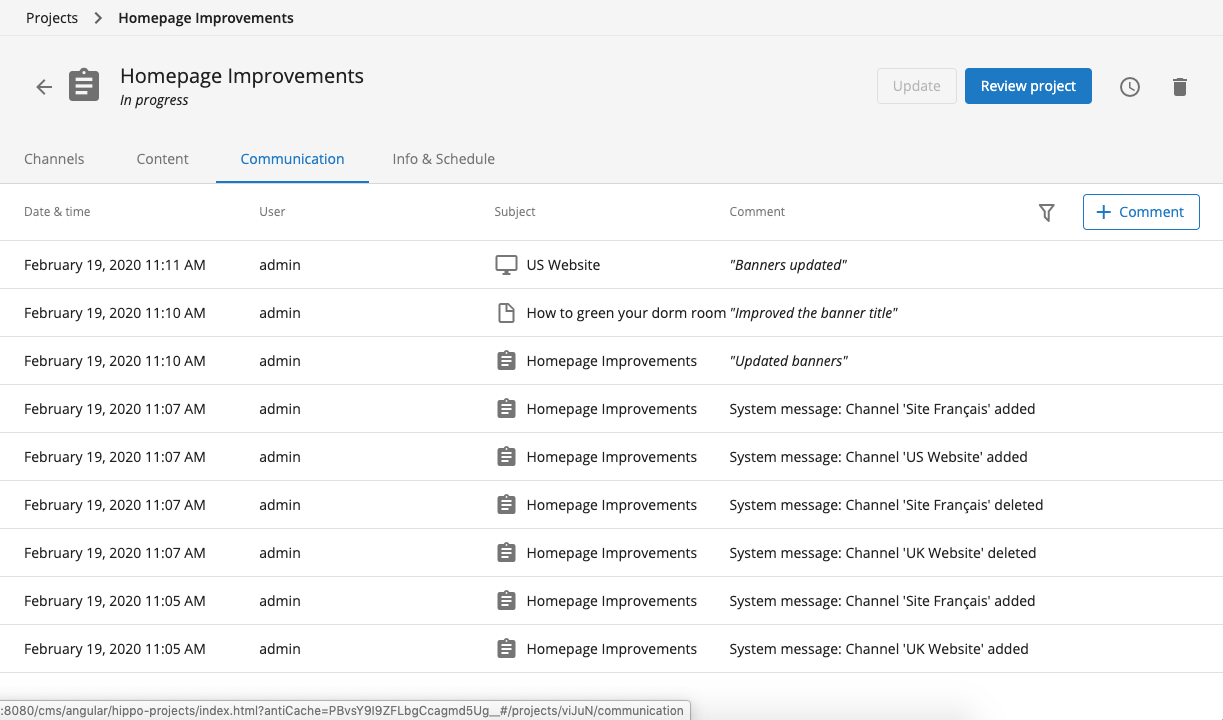
The Communication tab primarily serves as an entire log of all comments added to the project, regardless of what tab a comment was originally added from.
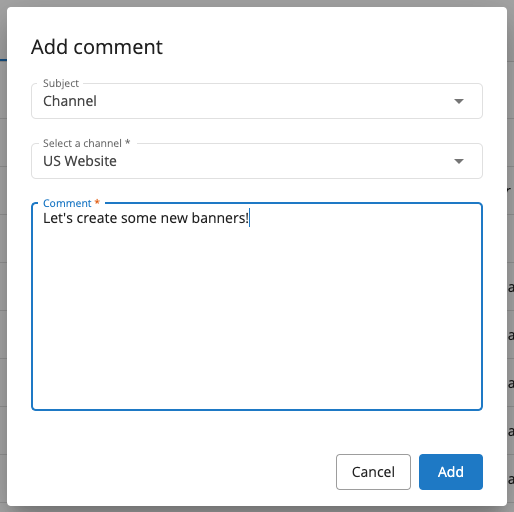
You can however also add comments from the Communication tab, and on doing so are asked what the comment is in reference to - whether it is a generic project-level comment, or a specific channel/document comment:
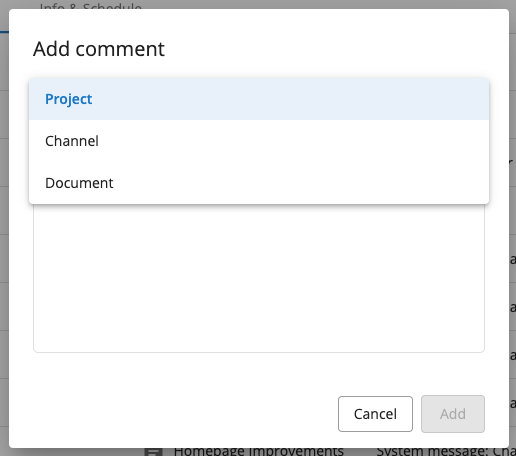
If it is a channel or document comment you are also asked to specify which channel/document it is in reference to:
On the Communication tab it is also possible to filter the entire comments log based on text, date created, and user: